Your Directory can include images for each record. As used in the following example a Staff Directory has an individual image for each staff member. When the user highlights (rollover) a record the image for that individual appears at the end of the record.

Prepare the Spreadsheet and images for import.
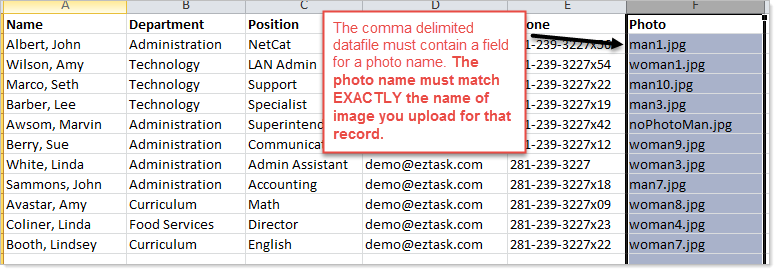
In this example we return to our previous spreadsheet. The spreadsheet contains a Column for Photo. Each name in the Photo column must correspond and match the file name for the image(s) to be uploaded. Export the Spreadsheet to a comma delimited file (.csv) as previously discussed.
Prepare your images. You should have an image for every record that contains a file name in the Photo Column. For the best results your images should all be the same size, 125 pixels by 125 pixels is a good size.
Import the datafile (.csv) and images
- Click the 'Import Data File' icon

- Browse to select the .csv file to upload or drag the file to the Click to Browse or Drop files here... button. , containing references to photo files.
- Next select the photos to upload that match the photo reference in the .csv file and click 'Apply'.
Change the Directory Properties to include the photos.
- Click on the 'Directory Properties icon

- In the column corresponding to your photos (in this example, it is named 'Photo'), set 'Get URL from' to the column corresponding to your photos.
- Then select 'Hide This Column' and click 'Apply'
