Use the TabStrip for adding layers of content in a limited space on a webpage and adding multiple options within one content area.
Note: Although the TabStrip is an effective way to organize information we caution against using nested TabStrips. Embedding TabStrips inside of TabStrips and creating multiple layers of content can be confusing and difficult for the user to follow.
The TabStrip default layout is one tab. Each Tab added will have one corresponding drop zone beneath it. The ACTIVE or SELECTED tab will display with a highlight color specific to your project style and design.
To add a TabStrip
- Drag the TabStrip Layout to the desired location on your page.
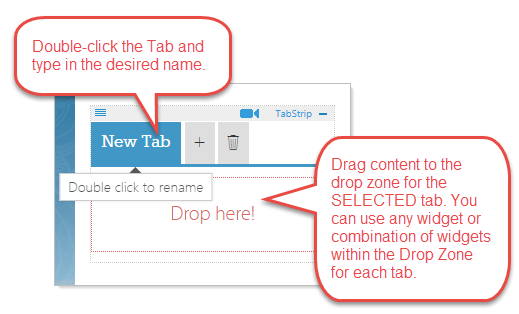
- Double-click the New Tab and add the new tab name.
- Drag a content widget to the Drop Zone below the tab to add content.
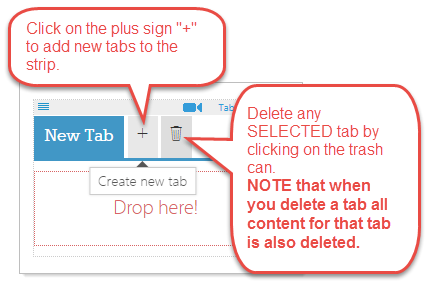
- Add new tabs by clicking on the "+" sign
- Click on the trash can to delete any active (SELECTED) tab
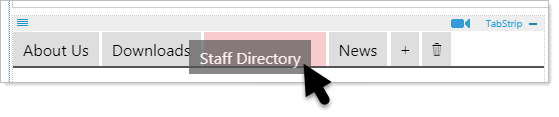
You can move tabs within the strip
- Click and hold the tab to be moved and then drag it to the desired location.
- The new tab position will highlight red, release the tab and it will appear in the new location.
You can now link to tabs within a page
- Add an anchor link to go to specific tab on a page by adding "?tab=My Tab Name" to the end of the link.
As an example: To link to a tab called Staff Directory within the HR (Human Resource) page the URL for that link would be:
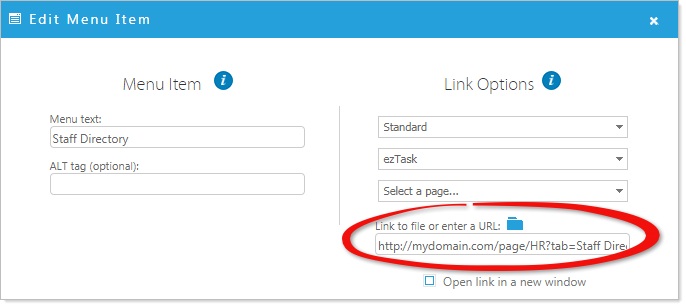
http://mydomain.com/page/HR?tab=Staff Directory
- Links to specific tabs cannot be selected through the browse feature of the menu or link manager but must be manually entered as in the following menu example.